Every homeowner in Eustis, Florida knows how quickly a malfunctioning HVAC system can disrupt family life. Whether it is summer’s relentless heat or a chilly winter night, your family relies on consistent indoor comfort. Smart preventative maintenance keeps your system running smoothly, avoiding costly breakdowns and energy waste. Discover simple steps and safety-focused habits that protect your investment while keeping your home comfortable every season.
Table of Contents
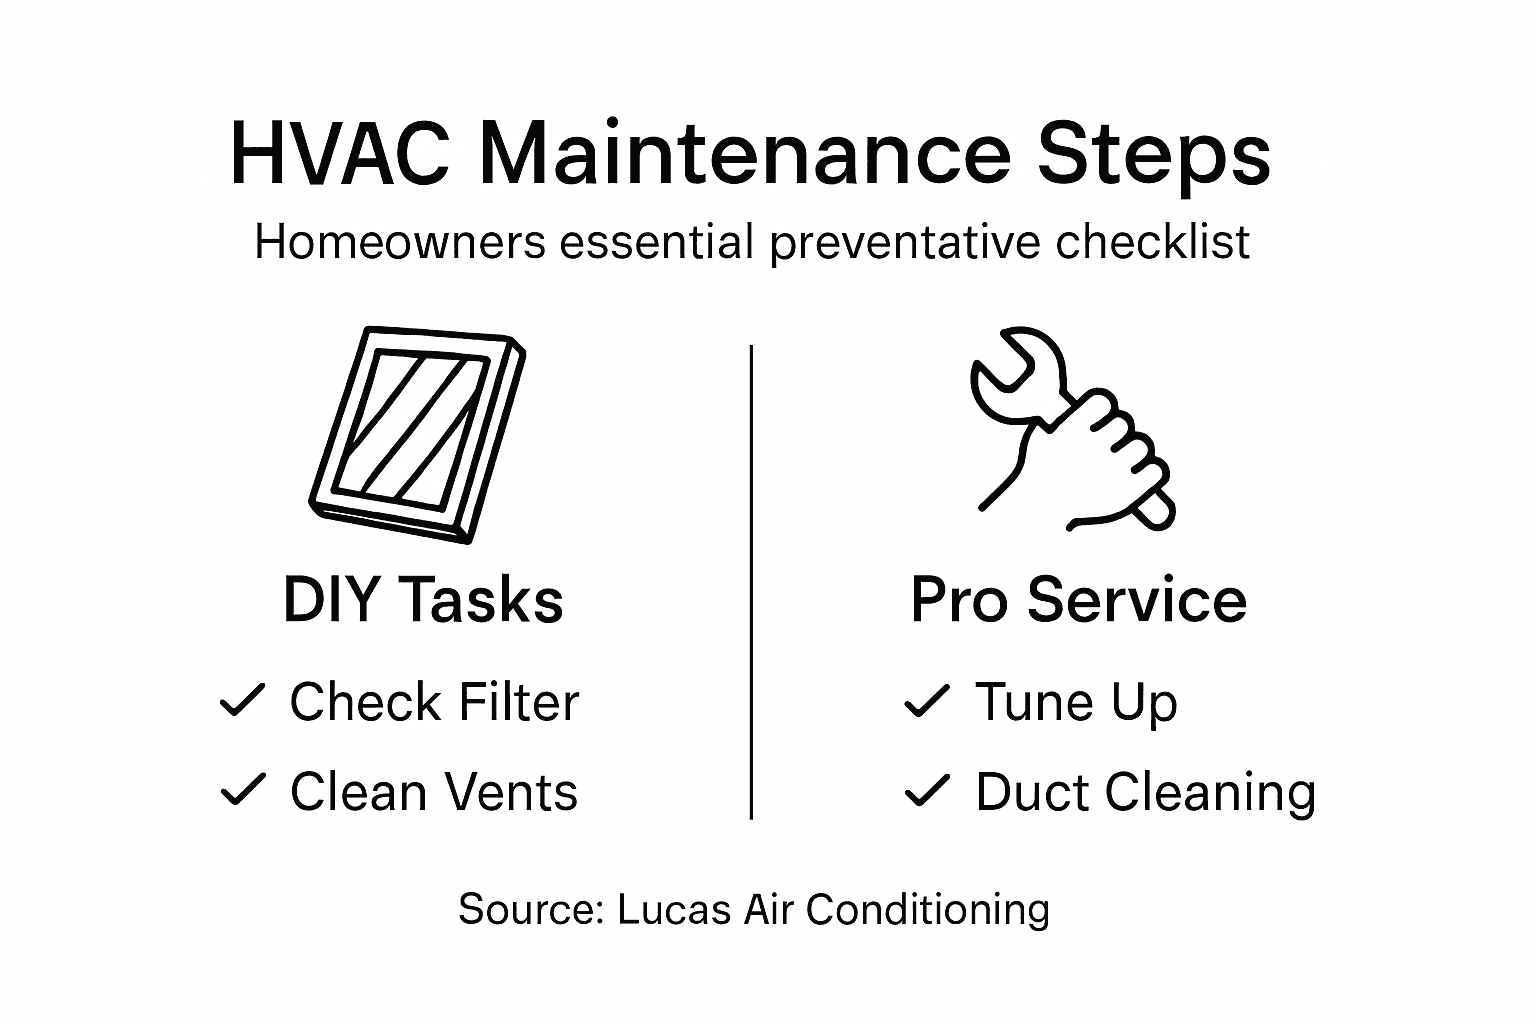
- Step 1: Gather Required Tools And Safety Equipment
- Step 2: Inspect And Replace Air Filters Regularly
- Step 3: Clean Key HVAC Components And Surroundings
- Step 4: Check System Operation And Thermostat Settings
- Step 5: Verify Efficiency And Schedule Professional Service
Quick Summary
| Key Point | Explanation |
|---|---|
| 1. Gather Essential Tools and Safety Gear | Collect tools like a multimeter and basic safety gear to prevent accidents before starting HVAC maintenance. |
| 2. Regularly Check and Replace Air Filters | Ensure optimal performance by routinely replacing air filters every 1 to 3 months, depending on factors like pets and allergies. |
| 3. Clean HVAC Components and Surroundings | Regularly clean dust and debris from outdoor units, indoor coils, and air vents to maintain efficient airflow and system longevity. |
| 4. Verify System Operation and Thermostat Settings | Check that your system operates correctly and that the thermostat settings align with your temperature preferences for comfort. |
| 5. Schedule Professional Maintenance Service | Regular professional checks are essential for diagnosing hidden problems and ensuring your HVAC system runs efficiently year-round. |
Step 1: Gather Required Tools and Safety Equipment
Before you touch a single part of your HVAC system, you need to assemble the right tools and safety gear. This step takes maybe 20 minutes but prevents accidents and ensures you work efficiently. Here in Eustis, where summer heat demands a reliable cooling system and winter occasionally requires heating, having the proper equipment means the difference between a smooth maintenance session and a frustrating, unsafe one.
Start with the basics that every homeowner should keep handy. You’ll need a multimeter to test electrical connections and check voltage, a set of screwdrivers (both Phillips and flathead), an adjustable wrench, and needle-nose pliers. A level proves useful when checking if your outdoor unit sits properly, and a flashlight or headlamp helps you see inside dark equipment cabinets. A fin comb straightens bent aluminum fins on your condenser coil, which gets damaged more often than you’d think. Pick up some electrical tape and a notepad for jotting down observations. Your local hardware store carries all of these items, and you probably already own most of them.
Now for the safety equipment, which you absolutely cannot skip. According to ASHRAE safety recommendations for HVAC systems, proper personal protective equipment is non-negotiable. Grab a pair of heavy-duty work gloves that protect your hands from sharp sheet metal edges and refrigerant burns. Safety glasses keep debris and dust out of your eyes when you’re working near the condenser. A dust mask or respirator protects your lungs when cleaning air filters and ductwork. A hard hat sounds overkill, but if you’re working near your outdoor unit on a roof or elevated platform, it’s worth wearing. Keep a pair of steel-toed boots handy for outdoor work. Have a fire extinguisher nearby, specifically rated for electrical fires, just in case. Some homeowners also grab a voltage tester to confirm power is off before touching electrical components.
The University of Georgia’s preventive maintenance handbook emphasizes that these items form the foundation of safe maintenance work. Don’t rush through this gathering phase. Lay everything out on a clean surface, check that tools work properly, and make sure safety equipment actually fits you. In Florida’s humidity and heat, work gloves that are too loose or too tight become annoying fast, and you’ll want to abandon them midway through a job. Take five minutes to test your multimeter with a battery to confirm it’s functioning. Your safety and your system’s longevity depend on being prepared before you start.
Pro tip: Keep a dedicated plastic toolbox just for HVAC maintenance and store it in a climate-controlled location like your garage or utility room, so you grab everything in one trip instead of hunting through your entire toolkit when you need to work on your system.
Step 2: Inspect and Replace Air Filters Regularly
Your air filter is the hardest working part of your HVAC system that most people completely ignore. This simple component catches dust, pollen, pet dander, and all the debris floating through your home’s air, but it doesn’t stay clean forever. Checking and replacing your air filter regularly keeps your system running efficiently, maintains better indoor air quality for your family, and prevents expensive repairs down the road. In Eustis, where summer heat pushes your system to work overtime and humidity makes dust accumulate faster, filter maintenance becomes even more critical.
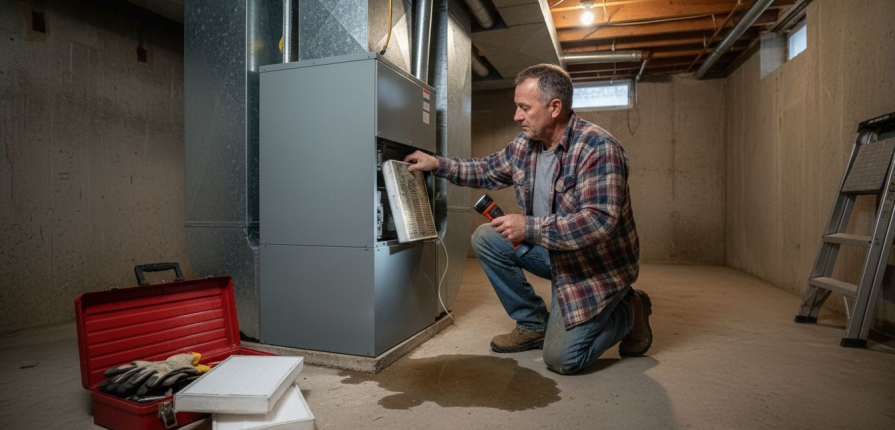
Start by locating your air filter, which typically sits inside a return air duct or blower compartment near your furnace or air handler. It’s usually housed in a cardboard frame and slides out easily. Before you replace it, take a good look at the current filter. Hold it up to a light source and check how much dirt and debris have accumulated on the surface. A filter that looks more gray than white is definitely ready for replacement. Don’t wait until it’s completely clogged, because overloaded filters reduce airflow significantly and force your system to work harder than necessary. Most homeowners should replace standard filters every 1 to 3 months, depending on factors like pets, allergies, and how often you run your system. If you have multiple pets or someone in your family has respiratory issues, check your filter monthly.
When buying a replacement filter, pay attention to the MERV rating printed on the frame. MERV stands for Minimum Efficiency Reporting Value, and it measures how well a filter captures particles. MERV 13 or higher filters work well for most residential homes because they capture small particulates without restricting airflow too much. Lower MERV ratings like 8 or 11 let more dust through, while higher ratings above 16 can make your system strain. Check your HVAC manual or give Lucas Air Conditioning a call to confirm which MERV rating suits your specific equipment. When you install the new filter, notice the arrow printed on the filter frame pointing in the direction of airflow. That arrow must point toward your furnace or air handler, not away from it. Slide the filter in straight and make sure it fits snugly without gaps around the edges, because air will bypass a loose filter entirely. Keep a log or set phone reminders for when you last replaced the filter, so you don’t lose track. Write the replacement date directly on the filter frame with a marker if you need a visual reminder.
Here’s a quick reference for common HVAC air filter types and their characteristics:
| Filter Type | Typical MERV Range | Lifespan | Best For |
|---|---|---|---|
| Fiberglass | 1-4 | 1 month | Basic dust protection |
| Pleated | 8-13 | 2-3 months | Improved air quality |
| HEPA | 17+ | 6-12 months | Allergy and asthma relief |
| Washable | 1-4 | Up to 5 years | Cost savings, light filtration |
Pro tip: Buy filters in bulk and keep a few extra on hand in your storage closet so you can swap out a dirty filter immediately instead of running your system with reduced airflow while you make a trip to the hardware store.
Step 3: Clean Key HVAC Components and Surroundings
Cleanliness matters more than most homeowners realize when it comes to HVAC performance. Dust and debris accumulate on critical components like evaporator coils, condenser coils, and fan blades, forcing your system to work much harder to move air through your home. This step focuses on safely cleaning the accessible parts of your system and the area surrounding your outdoor unit so your equipment operates at peak efficiency. In Eustis, where Florida’s humidity and pollen levels create constant challenges, regular cleaning prevents buildup that would otherwise reduce cooling capacity by 15 to 25 percent.
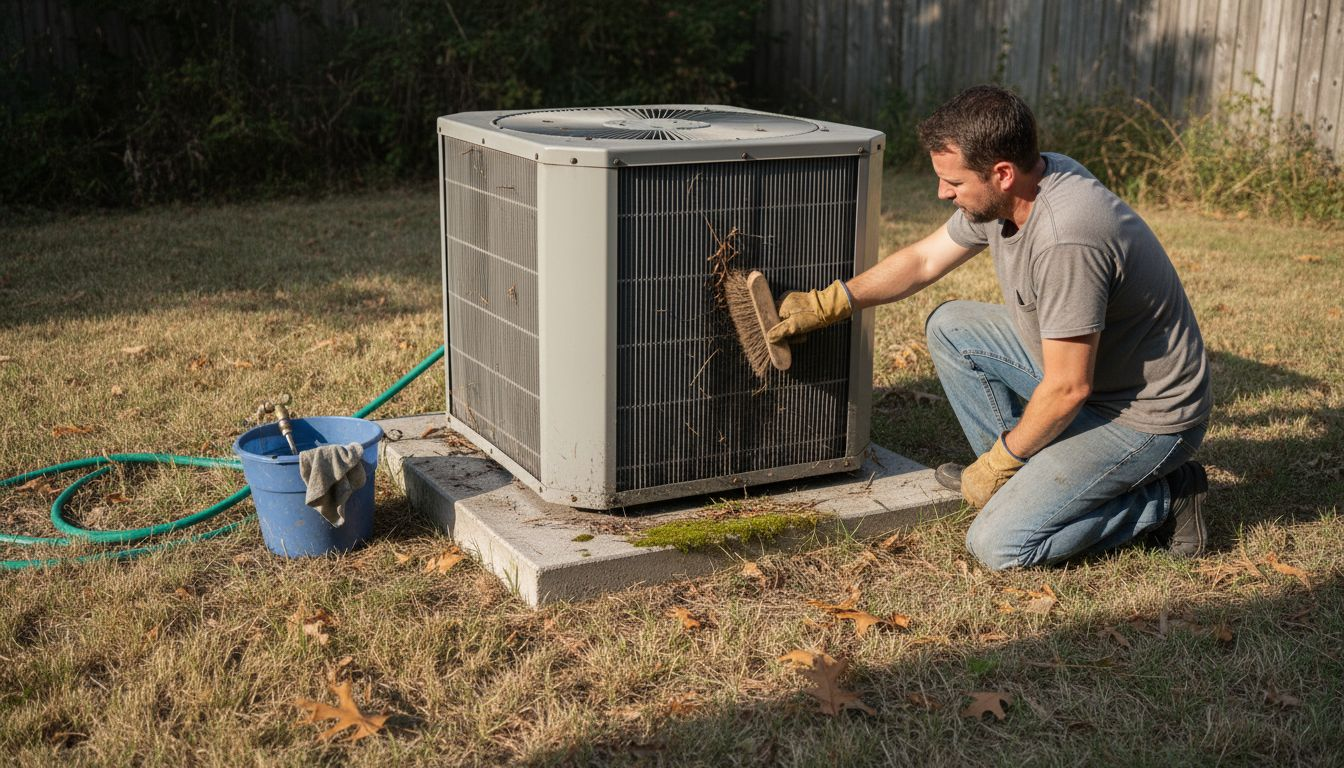
Start with the outdoor condenser unit, which takes the brunt of environmental abuse. Turn off power to your system at the breaker before touching anything. Look at the fins on the side of your outdoor unit and notice how closely they’re spaced together. Over time, leaves, grass clippings, dirt, and pollen cling to these fins and block airflow. Use your fin comb carefully to straighten any bent fins, and use a soft brush or old toothbrush to gently remove accumulated debris. A garden hose works well for rinsing away loose dirt, but avoid high pressure spray that can damage the fins further. Clear away any vegetation, leaves, or branches within two feet of your outdoor unit in all directions, so air can flow freely around the equipment. Next, move to your indoor components. The evaporator coil sits inside your air handler and collects condensation as it cools your air, making it a magnet for mold and mildew growth. This requires more care since you cannot see it directly. If you notice visible mold or slime inside your return air duct, that signals a problem. Regular cleaning of coils and ducts reduces energy consumption and maintains system reliability. For most homeowners, this cleaning is best handled by professionals like Lucas Air Conditioning who have proper equipment and know how to safely access these components. However, you can ensure the area around your indoor unit stays clean by keeping the furnace room or closet free from dust, pet hair, and debris. Vacuum around the unit monthly and wipe down any accessible surfaces with a damp cloth.
Pay special attention to your return air vents throughout your home. These are the large grilles where air gets sucked back into your system for cooling. Dust accumulates on and inside these vents, restricting the return airflow your system needs. Vacuum the grilles monthly and consider removing them to vacuum inside the ductwork as far as you can reach with your attachment. Maintaining clean air ducts and coil assemblies reduces malfunctions and energy waste while improving your indoor environmental quality. Don’t forget about the condensate drain line, a small pipe typically found near your indoor unit or running outside your home. This line removes moisture your system extracts from the air. Algae and mold can grow inside this line, blocking drainage and causing water to back up into your equipment. Pour a cup of white vinegar down the drain opening every few months to keep it flowing. While you’re cleaning, keep an eye out for any leaks, unusual odors, or visible damage that you should report to a professional.
Pro tip: Schedule a professional duct cleaning every 3 to 5 years and request a coil cleaning during your annual tune up, since these deep cleanings require specialized equipment and expertise that make the investment worthwhile for system longevity and indoor air quality.
Step 4: Check System Operation and Thermostat Settings
Your thermostat is the brain of your HVAC system, telling it when to heat, cool, or rest based on your home’s temperature and your schedule. If your thermostat settings are wrong or your system isn’t responding properly, you’re either wasting energy or sacrificing comfort. This step walks you through verifying that your system operates correctly and that your thermostat works as intended, ensuring your family stays comfortable while keeping your energy bills reasonable.
Start by looking at your thermostat display and checking what mode it’s currently set to. During Florida’s scorching summers, your system should be in cooling mode, while winter months might require heating or a switch to heat pump operation. Walk over to your air vents and feel the air coming out. In cooling mode, you should feel cold air flowing steadily. If air feels warm or just barely cool, your system may not be operating efficiently, which could indicate low refrigerant, a clogged filter you missed, or a compressor problem that requires professional attention. Listen to your outdoor unit. You should hear it running and feel air flowing out from the top of the condenser when the system is actively cooling. Silence from the outdoor unit when your thermostat calls for cooling suggests an electrical issue or compressor failure. Next, set your thermostat to heat mode for a moment and listen again. Your indoor furnace or heat pump should kick on within a minute or two. Set it back to cooling afterward if you’re in the middle of summer. Test the thermostat’s ability to control temperature by raising the set point a few degrees. Your air conditioning should shut off within seconds to a minute. Lower the set point below your current room temperature. The system should respond by turning on the compressor. Programmable thermostats can automate temperature adjustments without sacrificing comfort, which optimizes your energy use throughout the day. If you have a programmable or smart thermostat, review your temperature schedule. Many families benefit from setting the thermostat a few degrees higher when nobody’s home or during sleeping hours, then programming it to reach comfortable temperatures before everyone wakes or returns home. In Eustis, setting your system to 78 degrees Fahrenheit when nobody’s home during the day can reduce your cooling costs by 10 to 15 percent without making your home unbearably hot when you return.
Check your thermostat display for any error codes or warning messages. Modern thermostats often display alerts about low batteries, sensor problems, or system faults. If you see anything unusual, note the code and contact Lucas Air Conditioning to diagnose the issue. Verify that your thermostat battery, if it has one, is functioning properly. A dying battery can cause the thermostat to lose programming or fail to communicate with your system. Replace batteries annually as part of your spring maintenance routine. Verifying system controls and thermostat settings ensures your system operates according to your schedule and environmental needs for optimal comfort and efficiency. If you notice your system running constantly without reaching your set temperature, cycling on and off rapidly, or completely failing to respond to thermostat commands, these are signs of a deeper problem. Refrigerant leaks, electrical faults, or sensor failures typically require professional diagnosis. Don’t ignore these symptoms hoping they’ll resolve themselves. The longer a malfunctioning system runs, the more damage it sustains and the more you waste on utilities. Take a few minutes to document your thermostat readings now and compare them against readings three months from now. Tracking temperature consistency helps you notice gradual problems before they become emergencies.
Pro tip: Install a smart thermostat if your current model is over ten years old, since newer models learn your family’s patterns, adjust automatically based on occupancy, and provide mobile app control so you can manage your system remotely and track real time energy usage.
Step 5: Verify Efficiency and Schedule Professional Service
You’ve completed the basic maintenance tasks that keep your HVAC system running smoothly, but there’s a limit to what homeowners can safely accomplish alone. Professional technicians have specialized equipment, training, and certifications that allow them to diagnose problems you cannot detect with visual inspection or simple testing. This final step focuses on recognizing when your system needs professional attention and understanding why scheduling regular service from qualified contractors protects your investment and ensures your family’s comfort year round.
Start by assessing your system’s overall performance based on what you’ve observed during your maintenance work. If you noticed any of the following red flags, contact Lucas Air Conditioning immediately. Your system runs constantly but never reaches your set temperature. The outdoor unit makes unusual grinding, squealing, or banging noises. You see visible leaks or corrosion around refrigerant lines. Your energy bills have increased noticeably without any change in usage patterns. Certain rooms remain significantly warmer or cooler than others despite closed vents. You smell burning or chemical odors coming from vents or your furnace area. Your thermostat fails to respond to adjustments or displays error codes. Any of these symptoms indicates that certified technicians using standards compliant approaches should inspect your equipment to verify efficiency and identify needed repairs. Don’t attempt to fix refrigerant leaks, electrical problems, or compressor issues yourself. These require specialized tools, training, and EPA certification that only licensed professionals possess. Attempting DIY repairs on these components can damage your equipment further and void any remaining warranty coverage.
Professional service should happen at least twice yearly in Florida homes. Schedule a spring tune up before summer cooling season begins, typically in April or May. This appointment allows technicians to test refrigerant levels, inspect electrical connections, check compressor operation, clean coils and fins, verify thermostat calibration, and ensure everything runs at peak efficiency before you rely on your system heavily. Schedule a fall tune up in September or October before heating season, even if you rarely use heat in Central Florida. Technicians can verify furnace operation, test ignition systems if applicable, check heat exchanger integrity, and ensure your system is ready if temperatures drop unexpectedly. Professional service at recommended intervals helps detect inefficiencies and repairs early while maintaining system reliability and indoor air quality. When you call to schedule service, mention any problems you’ve noticed during your DIY maintenance so technicians can prioritize those issues. Keep records of all maintenance you’ve performed and what you observed, including when you replaced filters, any unusual noises you heard, and temperature readings from different rooms. This information helps technicians understand your system’s history and identify patterns that might indicate developing problems. Ask your technician to show you any issues they find and explain what caused them. Understanding how your system works helps you catch problems earlier in the future and make informed decisions about repairs versus replacement if major components fail. Don’t delay scheduling professional service thinking you’ll save money. A small refrigerant leak caught early costs less to fix than a compressor failure caused by prolonged undercharging. A thorough cleaning and tune up typically costs between 150 and 300 dollars but can prevent repairs costing thousands.
Compare DIY maintenance and professional service for HVAC systems:
| Task Type | DIY Maintenance | Professional Service |
|---|---|---|
| Frequency | Monthly to quarterly | Twice yearly |
| Tools Needed | Basic hand tools, safety gear | Advanced diagnostics, specialty tools |
| Tasks Covered | Filter changes, vent cleaning | Refrigerant tests, electrical checks |
| Issues Detected | Visible wear, basic airflow problems | Hidden faults, efficiency losses |
Pro tip: Enroll in a preventative maintenance agreement with Lucas Air Conditioning to lock in service discounts, receive priority scheduling during busy seasons, and ensure your system gets checked before minor issues become major problems that leave your family without cooling during peak summer heat.
Protect Your Home Comfort with Expert HVAC Maintenance from Lucas Air Conditioning and Heating
Maintaining your HVAC system is crucial to avoid costly breakdowns and ensure consistent comfort in your Eustis home. This guide highlighted common challenges like clogged air filters, dirty coils, and thermostat misconfigurations that reduce efficiency and drive up energy bills. You deserve peace of mind knowing your heating and cooling equipment runs smoothly throughout Florida’s year-round climate. By addressing issues early and keeping your system clean and properly calibrated, you protect your investment and your family’s indoor air quality.
Trust Lucas Air Conditioning and Heating, a veteran-owned local business specializing in professional preventative maintenance, system tune-ups, and duct cleaning. Take advantage of our current Special Offers to get the best value for your home’s HVAC care. Don’t wait for a costly emergency. Schedule your service today at https://lucasair.com and secure reliable comfort all year long. For tips on improving air flow, also check our Ventilation Archives for helpful insights.
Frequently Asked Questions
What tools do I need for HVAC preventative maintenance?
You will need basic tools like a multimeter, screwdrivers, adjustable wrench, and needle-nose pliers. Additionally, gather safety equipment including heavy-duty gloves, safety glasses, and a dust mask to ensure safe and efficient maintenance.
How often should I replace my HVAC air filter?
Most homeowners should replace standard air filters every 1 to 3 months, depending on factors like pets and allergies. Check your filter monthly, especially if you have multiple pets, and note the last replacement date to maintain efficient airflow.
What are the signs that my HVAC system needs professional service?
Signs include constant running without reaching the set temperature, unusual noises from the unit, or visible leaks. If you notice any of these issues, contact a qualified technician to diagnose the problem promptly.
How can I clean my outdoor HVAC unit safely?
Start by turning off the power to your system at the breaker. Then, gently clean the fins using a soft brush and remove debris surrounding the unit to ensure proper airflow; do this regularly to maintain efficiency.
What should I do if my thermostat isn’t responding?
If your thermostat fails to respond, first check the batteries if applicable. If it continues to show issues, schedule a professional inspection, as it may be indicative of deeper electrical problems.
How often should I schedule professional HVAC maintenance?
Schedule professional maintenance at least twice a year, once in spring before the cooling season and once in fall before the heating season. This regular service helps prevent major issues and maintains system efficiency.
