
Raising your thermostat to 78°F when you’re home, sealing air leaks around doors and windows, and swapping a clogged filter for a fresh one are three moves you can make today that will show up on your next utility bill. Heating and cooling account for nearly half of the average home’s energy use, which means your AC is almost certainly the single largest line item you can actually control. The good news: most of the highest-impact ways to reduce AC costs require no tools and no contractor.
Start here — five things to do right now:
- Set your thermostat to 78°F while home, and raise it 7°F when you leave
- Close blinds and curtains on south- and west-facing windows before noon
- Replace or check your air filter (monthly in summer, or every 30–60 days)
- Walk your home’s perimeter and press a lit incense stick near door frames and window edges — smoke drift reveals air leaks
- Clear at least 2 feet of space around your outdoor condenser unit
These steps alone can meaningfully cut your cooling bill. The sections below go deeper on each one, add several more, and tell you when it’s time to stop DIYing and call a licensed technician.
Key Takeaways
Combining a higher thermostat setpoint, sealed ducts, regular filter changes, and annual professional maintenance is the most reliable way to cut air conditioning costs without replacing your equipment.
| Point | Details |
|---|---|
| Thermostat setpoint | Set to 78°F while home, raise 7°F when away — the single highest-impact no-cost change. |
| Duct leakage | Typical systems lose 20–30% of conditioned air to leaks; sealing accessible joints pays back quickly. |
| Filter discipline | Replace every 30–60 days in summer — a clogged filter increases runtime and wears the system faster. |
| Equipment age | Systems older than 15 years are candidates for replacement with ENERGY STAR-rated models for measurable savings. |
| Lucasair | Preventative maintenance agreements and duct sealing services address the issues that DIY steps can’t fully resolve. |
Table of Contents
- 10 practical ways to reduce AC costs at home
- Thermostat strategy: setpoints, placement, and whether to leave the AC on
- Seal, insulate, and fix ducts: small fixes, big savings
- Choosing efficient equipment: SEER, EER, heat pumps, and rebates
- Low- and no-cost daily habits that add up
- DIY quick checklist: weekly, monthly, and annual tasks
- When to call a professional HVAC technician
- What a few low-cost measures actually look like in practice
- A note from a local HVAC technician
- How Lucasair can help when DIY isn’t enough
- Sources
10 practical ways to reduce AC costs at home
Heating and cooling make up close to half of a typical home’s energy bill, so even modest improvements compound quickly over a Florida summer. Here are ten actions ordered roughly by ease and impact.
## 1. Raise the thermostat setpoint
The U.S. Department of Energy recommends starting at 78°F when you’re home and raising it about 7°F when the house is empty. Every degree you push above 72°F reduces your cooling load noticeably. If 78°F feels warm at first, give your body three to five days to adjust — most people stop noticing within a week.
## 2. Use ceiling fans correctly
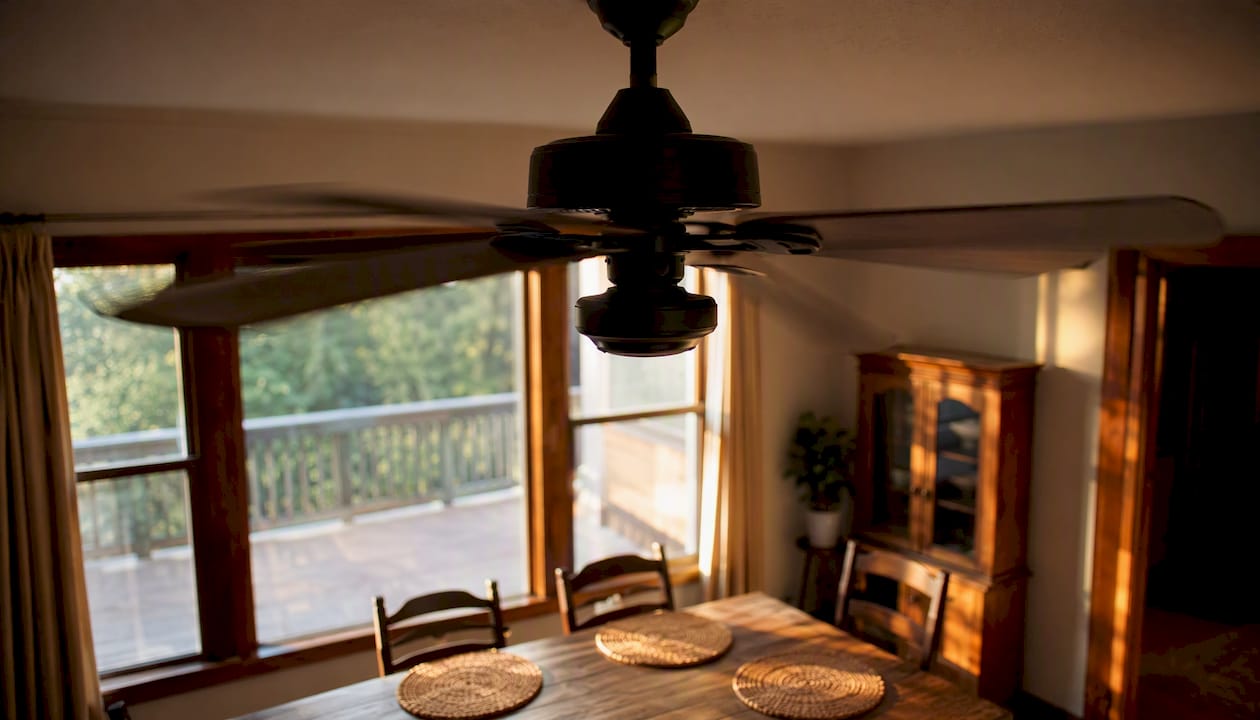
Ceiling fans cool people, not rooms. The wind-chill effect lets you feel comfortable at a thermostat setting 4°F higher than you otherwise would, which cuts runtime. The catch: a fan running in an empty room just burns electricity. Turn fans off every time you leave.
## 3. Block solar heat with window coverings
South- and west-facing windows can pour heat into a room faster than your AC can remove it. Closing blinds, shades, or curtains during peak sun hours — roughly 10 AM to 4 PM — keeps that heat outside where it belongs. Cellular shades and blackout curtains outperform standard mini-blinds by a wide margin. Window film is another option: solar window tint can meaningfully reduce the heat entering through glass and lower AC runtime without blocking your view.
## 4. Seal air leaks around doors and windows
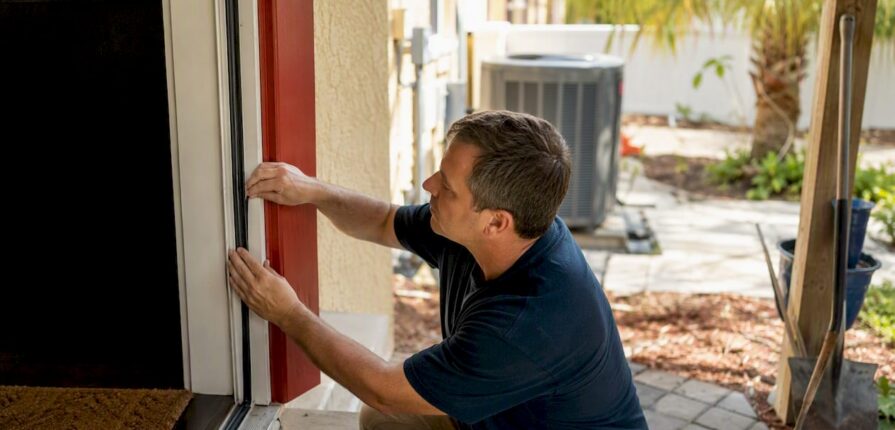
Gaps around door frames, window sills, and plumbing penetrations let conditioned air escape and hot outside air seep in. A $5 tube of caulk or a roll of weatherstripping handles most of it. Air sealing and insulation together can save homeowners up to about 20% on heating and cooling costs, depending on how leaky the home was to begin with.
## 5. Change your air filter on schedule
A clogged filter forces your system to work harder to pull air through, which increases runtime and wears components faster. In Central Florida summers, check the filter monthly and replace it every 30–60 days. A $4 filter is far cheaper than a service call.
## 6. Schedule laundry, cooking, and dishwashing for off-peak hours
Ovens, dryers, and dishwashers dump heat and humidity into your home. Running them after 8 PM or before 9 AM keeps that heat load off your AC during the hottest part of the day. This costs nothing and takes about 30 seconds of habit change.
## 7. Use a programmable or smart thermostat
A properly programmed thermostat does the setpoint work automatically. A well-used programmable thermostat can save homeowners a meaningful amount yearly in energy costs. Smart thermostats go further by learning your schedule and adjusting in real time. Most utility companies in Florida offer rebates on qualifying models, so check your provider’s website before you buy.
## 8. Seal and insulate your ductwork
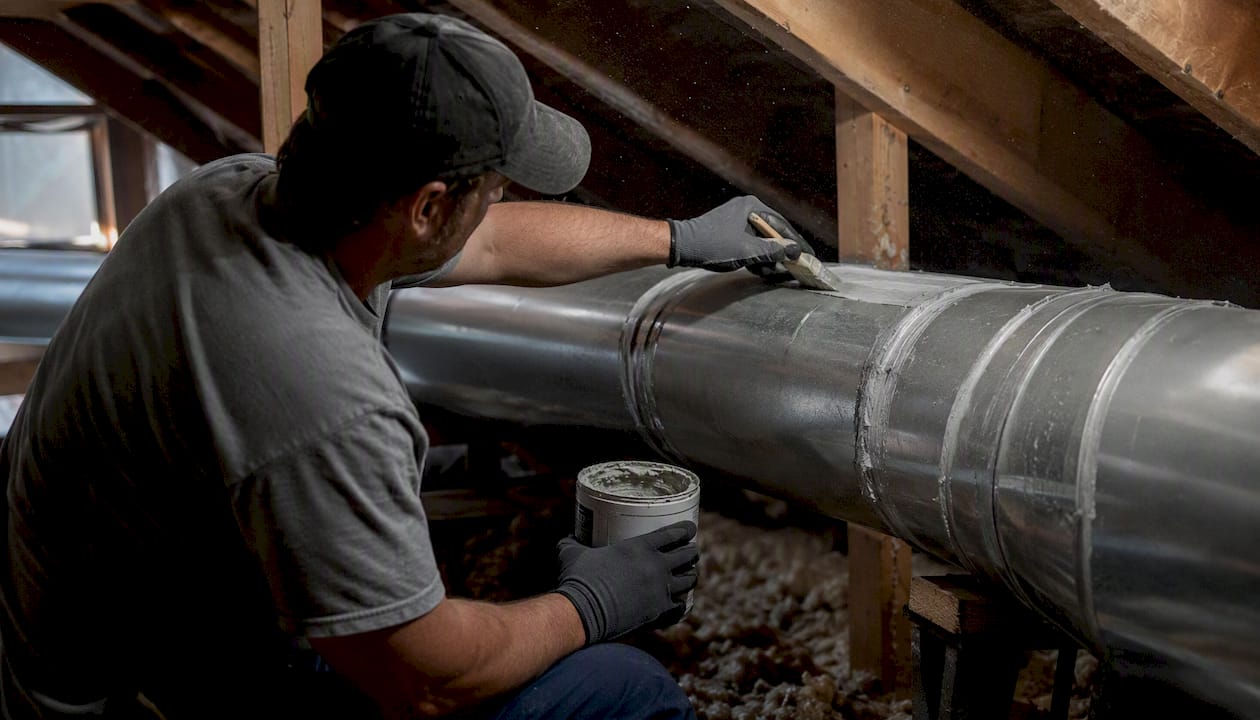
Typical duct systems lose 20–30% of the air moving through them to leaks. That’s conditioned air bleeding into your attic or wall cavities instead of reaching your living space. Accessible duct joints can be sealed with mastic sealant or foil-backed tape (not standard duct tape, which fails quickly). Insulating ducts that run through unconditioned spaces — attics especially — is one of the highest-return improvements a Central Florida homeowner can make.
## 9. Use natural ventilation and night cooling when conditions allow
On evenings when outdoor temperatures drop below 75°F and humidity is manageable, opening windows on opposite sides of the house creates cross-ventilation that can cool the space without running the compressor at all. In Florida, this window is narrow in July and August but more available in spring and fall. A whole-house fan can accelerate the process significantly.
## 10. Keep the outdoor condenser unit clear
Grass, shrubs, and debris within 2 feet of the condenser restrict airflow and force the unit to work harder. Rinse the fins with a garden hose (power washers can bend the fins) at the start of each cooling season. Shade trees planted to the west of the unit can reduce the heat load on the condenser, though they need to be far enough away that leaves and debris don’t clog the unit.
Pro Tip: Run a portable dehumidifier in rooms that feel clammy even when the AC is on. High humidity makes 78°F feel like 85°F, and reducing indoor moisture lets you raise the thermostat setpoint without losing comfort.
Thermostat strategy: setpoints, placement, and whether to leave the AC on
The DOE and ENERGY STAR both recommend 78°F as a starting setpoint when you’re home, with a 7°F setback when the house is empty. That single habit, applied consistently, is one of the most reliable ways to lower AC energy usage without spending a dollar.
Placement matters more than most homeowners realize. A thermostat mounted near a lamp, a television, or a sunny window reads a higher temperature than the rest of the room and tells the system to keep running long after the house is actually comfortable. The ideal location is an interior wall, away from direct sunlight, drafts, and heat-generating appliances.
Should you turn the AC completely off when you leave?
Short answer: no, especially in a humid climate. In high-humidity regions, turning the system fully off can allow moisture to build up, creating conditions for mold and making the house take much longer to recover when you return. The better move is to raise the setpoint by 7–10°F rather than shutting the system down. Your home stays protected, and the system doesn’t have to work as hard to pull the temperature back down when you get home.
Myth to drop: Setting the thermostat to 65°F does not cool your home faster. The system runs at the same rate regardless of the setpoint — a lower number just means it runs longer, burning more energy to overshoot the temperature you actually want.
Do:
- Set a schedule: 78°F while home, 85°F while away, 80°F overnight
- Place the thermostat on an interior wall away from heat sources
- Use a programmable or smart thermostat to automate setbacks
Don’t:
- Crank the thermostat to 65°F hoping to cool down faster
- Leave the system fully off in humid climates for extended periods
- Block the thermostat sensor with furniture or curtains
Pro Tip: If your utility offers time-of-use rates, pre-cool your home to 76°F before peak pricing hours (typically 4–9 PM), then let the thermostat drift up to 80°F during that window. You get the same comfort at a lower cost.
Seal, insulate, and fix ducts: small fixes, big savings
Duct leakage typically accounts for a 20–30% loss of conditioned air before it ever reaches your living space. In a home with a 3-ton system, that’s the equivalent of running a window unit continuously — and paying for it — while it cools your attic.
Common air-leak locations to check:
- Attic hatch edges and pull-down stair frames
- Around window frames and door thresholds
- Electrical outlets and switch plates on exterior walls
- Plumbing and pipe penetrations through floors and walls
- Recessed light fixtures in ceilings below attic space
For ducts specifically, look for disconnected joints, visible gaps at registers, and duct runs that pass through unconditioned attic space without insulation. Mastic sealant (a paste applied with a brush) is the most durable fix for duct joints. Foil-backed tape works for smaller gaps. Standard cloth duct tape dries out and fails within a year or two — skip it.
Filter maintenance rhythm:
| Task | Frequency | Notes |
|---|---|---|
| Check filter | Monthly | Hold it up to light — if you can’t see through it, replace it |
| Replace standard 1-inch filter | Every 30–60 days in summer | More often with pets or dusty conditions |
| Replace thicker media filter (4–5 inch) | Every 30–60 days | Follow manufacturer guidance |
| Clean reusable filter | Monthly | Rinse, dry fully before reinstalling |
DIY vs. pro guidance: Caulking windows, adding weatherstripping, and replacing filters are straightforward homeowner tasks. Sealing duct joints in accessible areas is also DIY-friendly. But if your ducts run through a sealed attic, if you suspect major duct disconnections, or if your energy bills are high despite doing everything above, a professional duct inspection with a blower door test will pinpoint exactly where the losses are. That kind of diagnostic typically runs $150–$400 and can identify problems that save far more than the inspection cost. For a full walkthrough of what professional duct cleaning and sealing involves, Lucasair has a detailed guide on the process.
Choosing efficient equipment: SEER, EER, heat pumps, and rebates
SEER (Seasonal Energy Efficiency Ratio) measures how efficiently a central AC system performs across a full cooling season. EER (Energy Efficiency Ratio) measures efficiency at a single peak-load condition and matters most for room air conditioners. Higher numbers mean lower operating costs. ENERGY STAR-qualified room air conditioners with higher EERs cost less to run and handle humidity better when properly sized.
When does replacement make sense?
Replacing a system older than about 15 years with an ENERGY STAR-rated model can cut energy use significantly. Beyond age, watch for these signals:
- Frequent repairs in the past two years
- Uneven cooling or rooms that never reach setpoint
- Refrigerant leaks (a licensed technician must handle these)
- Energy bills climbing year over year with no change in usage habits
Heat pumps deserve a mention here. Modern variable-speed heat pumps handle Florida’s climate well and can deliver both heating and cooling at efficiencies that standard AC systems can’t match. If you’re replacing a system anyway, a heat pump is worth getting a quote on.
Sizing and installation matter as much as the rating. Poor installation can reduce a unit’s efficiency by up to 30%. Proper sizing uses ACCA Manual J load calculations — not a rule-of-thumb based on square footage alone. An oversized unit short-cycles, fails to remove humidity, and wears out faster. An undersized unit runs constantly and never catches up on hot days.
Ballpark replacement costs for a central AC system in a typical Florida home range from roughly $3,500 to $8,000 or more depending on system size, efficiency tier, and installation complexity. These are ranges, not quotes — get at least two estimates from licensed contractors.
Where to find rebates: Check your local utility’s website, the ENERGY STAR rebate finder at energystar.gov, and the federal tax credit provisions under the Inflation Reduction Act, which cover qualifying heat pumps and high-efficiency AC systems.
Pro Tip: Ask any contractor for a Manual J calculation before they size your replacement system. If they quote a size based only on your old unit or square footage, that’s a red flag — proper load calculations account for insulation, window area, orientation, and local climate data.
Low- and no-cost daily habits that add up
Behavior changes cost nothing and compound over an entire cooling season. These are the ones that actually move the needle:
- Run ceiling fans only when people are present. A fan left on in an empty room adds to your bill without cooling anyone.
- Close blinds on south and west windows before 10 AM. Getting ahead of the sun is more effective than reacting after the room heats up.
- Run the dishwasher and dryer during cooler times of the day, such as evenings or early mornings. Both generate heat and humidity that your AC has to counteract.
- Switch to LED bulbs throughout the home. Incandescent bulbs convert most of their energy to heat, not light — a meaningful source of indoor heat gain in older homes.
- Keep the outdoor condenser clear. Trim back plants, remove debris after storms, and rinse the fins at the start of each season.
- Take shorter, cooler showers in the morning or evening. Hot showers spike indoor humidity, which makes your AC work harder to maintain comfort.
- Use a microwave, slow cooker, or outdoor grill instead of the oven on hot afternoons. An oven running for an hour can raise kitchen temperature by several degrees.
One habit that backfires: leaving ceiling fans running throughout the house all day because it “feels like it’s doing something.” It isn’t, unless someone is in the room. That’s a straightforward electricity cost with no cooling benefit.
Small habits don’t produce dramatic single-month savings, but over a 6-month Florida cooling season they accumulate into a real difference on your annual energy bill.
DIY quick checklist: weekly, monthly, and annual tasks
A simple maintenance rhythm prevents wasted energy and catches small problems before they become expensive repairs. Here’s what to do and when:
- Weekly: Walk around the outdoor condenser and clear any leaves, grass clippings, or debris. Check that supply and return vents inside the home are open and unobstructed by furniture or rugs.
- Monthly: Check the air filter. Replace it if it’s visibly dirty or if it’s been 30 days during peak cooling season. Wipe down supply registers if dust is accumulating.
- Seasonally (start of cooling season): Rinse condenser fins with a garden hose. Check visible duct connections in the attic or crawl space for gaps. Test the thermostat by running a setback cycle and confirming the system responds correctly. Inspect window and door weatherstripping for cracks or compression failure.
- Annually: Schedule a professional tune-up before the heat peaks — March or April in Central Florida. A technician will check refrigerant levels, measure airflow, inspect electrical connections, clean the evaporator and condenser coils, and flag anything that’s trending toward failure.
For a more detailed version of this schedule, Lucasair’s home HVAC maintenance checklist covers each step with specifics on what to look for.
Pro Tip: Buy a box of filters at the start of the season and store them next to the air handler. When the filter is right there, you’ll actually replace it on time instead of putting it off for another week.
When to call a professional HVAC technician
Some problems are genuinely beyond what a homeowner should attempt. Refrigerant handling requires an EPA Section 608 certification — it’s not a DIY task, and attempting it without proper equipment is both unsafe and illegal. Electrical work inside the air handler carries real risk. If you’re seeing any of the following, it’s time to call a licensed technician:
- The system is blowing warm air despite a correct thermostat setting
- Ice is forming on the refrigerant lines or evaporator coil
- You hear grinding, banging, or squealing from the air handler or outdoor unit
- Energy bills have jumped significantly with no change in usage
- The system is short-cycling (turning on and off every few minutes)
- The unit is more than 10–15 years old and underperforming
- You smell a musty or burning odor from the vents
What a pro does during a diagnostic or tune-up:
- Checks refrigerant charge and looks for leaks
- Measures airflow across the evaporator coil
- Inspects and cleans the evaporator and condenser coils
- Tests electrical connections, capacitors, and contactors
- Checks the condensate drain line for blockages
- Inspects accessible ductwork for leaks or disconnections
- Verifies thermostat calibration and operation
Typical cost ranges: A standard tune-up runs roughly $75–$150. Diagnostic service calls typically run $75–$125 before any repair work. Common repairs — capacitor replacement, contactor swap, drain line clearing — generally fall in the $100–$350 range. Refrigerant recharge costs vary significantly based on the refrigerant type and how much is needed.
For a rundown of the most common faults and what they cost to fix, Lucasair’s guide to common AC repair issues is worth a read before you call anyone.
Pro Tip: Schedule your annual tune-up in March or early April — before the heat arrives and before technicians are booked out two weeks. You’ll get better availability, and any parts that need ordering won’t leave you without AC in July.
What a few low-cost measures actually look like in practice
Consider a 1,800-square-foot home in Central Florida with a 10-year-old 3-ton system, running the AC roughly 10 months per year. The homeowner applies three changes over one cooling season:
- Raises the thermostat setpoint from 72°F to 78°F while home, and to 85°F while away
- Replaces a clogged filter and commits to monthly replacements
- Seals visible duct gaps in the attic with mastic sealant
The assumptions here matter: a home that already runs at 78°F with clean filters and sealed ducts won’t see the same gains. But in Central Florida, where homes often have duct systems running through hot attics and thermostats set to 70°F or below, the opportunity is real. The benefits of regular AC maintenance compound over time — a system that’s been tuned and maintained consistently runs more efficiently than one that’s been ignored, even if both are the same age.
A note from a local HVAC technician
The most common pattern we see at Lucasair: a homeowner has been running their system at 70°F for years, the filter hasn’t been changed since last fall, and the outdoor unit is half-buried in overgrown shrubs. Fix those three things and the system often runs noticeably better before we’ve touched a single component.
The second most common issue is a thermostat mounted on a wall that gets afternoon sun through a nearby window. The sensor reads 82°F when the room is 76°F, so the system never shuts off. Moving the thermostat — or even just blocking that window — fixes what looked like a refrigerant problem.
For Central Florida specifically, the energy-saving strategies that work best account for high humidity and long cooling seasons. What works in a dry climate doesn’t always translate here.
How Lucasair can help when DIY isn’t enough
When filter changes and thermostat adjustments have gone as far as they can, the next level of savings usually requires a professional eye. Lucas Air offers preventative maintenance agreements that cover annual tune-ups, priority scheduling, and discounts on repairs — the kind of consistent attention that keeps a system running at its rated efficiency instead of drifting toward a breakdown.

Beyond maintenance, Lucasair handles duct sealing and cleaning, full system diagnostics, and equipment replacement with proper Manual J sizing. For homeowners in Central Florida who are ready to replace an aging system, the HVAC maintenance and comfort services in Eustis page covers what a full-service relationship looks like. If you’re in The Villages area, the local HVAC contractor page is the right starting point. Book a tune-up before the summer peak and you’ll go into the hottest months with a system that’s been checked, cleaned, and confirmed to be running efficiently.
Sources
Recommended
- Energy saving HVAC tips for Central Florida: Cut bills 30% – Lucas Air Conditioning and Heating
- Hotel HVAC energy-saving tips: cut costs 45% in 2026 – Lucas Air Conditioning and Heating
- Common AC Repair Issues Every Homeowner Should Know – Lucas Air Conditioning and Heating
- Prepare HVAC for Summer and Maximize Comfort Easily – Lucas Air Conditioning and Heating
