When your air conditioning fails on a scorching Central Florida afternoon, panic sets in fast. You need cool air now, but calling a technician immediately might not be necessary if you can identify the problem yourself. This troubleshooting guide walks you through systematic steps to diagnose common HVAC issues, empowering you to restore comfort quickly or know exactly when professional help is essential.
Table of Contents
- Common HVAC Problems And What They Mean
- Preparing For HVAC Troubleshooting: Tools And Safety Tips
- Step By Step HVAC Troubleshooting Process
- Common Troubleshooting Mistakes And When To Call A Professional
- Get Expert HVAC Troubleshooting And Repair Help In Central Florida
Key takeaways
| Point | Details |
|---|---|
| Early symptom identification | Recognizing warning signs early prevents expensive HVAC damage and costly emergency repairs. |
| Step by step diagnostics | Following a systematic troubleshooting process helps pinpoint common issues quickly and accurately. |
| Maintenance prevents failures | Regular filter changes and annual tune-ups dramatically extend HVAC system lifespan. |
| Professional refrigerant handling | Refrigerant leaks require certified technicians to avoid compressor failure and environmental harm. |
Common HVAC problems and what they mean
Your HVAC system communicates through symptoms. Recognizing these signals helps you narrow down what’s wrong before you start troubleshooting.
Weak airflow from vents often indicates dirty filters, blocked ducts, or failing blower motors. Uneven cooling across rooms suggests ductwork leaks or thermostat placement issues. Strange noises like grinding, squealing, or hissing point to mechanical wear, loose components, or refrigerant leaks that cause cooling loss. Higher than normal energy bills without usage changes signal efficiency problems.
Watch for these specific warning signs:
- Ice buildup on evaporator coils indicates low refrigerant or airflow restriction
- Frequent cycling on and off suggests thermostat problems or refrigerant issues
- Warm air from vents during cooling mode points to compressor failure or refrigerant loss
- Musty odors indicate mold growth in ducts or drain pans
- Water pooling around the unit shows condensate drain clogs
Refrigerant leaks deserve immediate attention. When refrigerant levels drop, your system loses cooling capacity and forces the compressor to work harder. This overwork leads to complete compressor failure, turning a manageable repair into a major replacement. Following a preventative maintenance guide helps catch these issues before they escalate.
Pro Tip: Keep a log of unusual symptoms with dates and times. Patterns help technicians diagnose intermittent problems faster.
Preparing for HVAC troubleshooting: tools and safety tips
Before touching your HVAC system, gather the right tools and prioritize safety. Proper preparation makes troubleshooting faster and prevents injuries.
You’ll need basic equipment:
- Digital multimeter for testing electrical connections and voltage
- Flashlight or headlamp for inspecting dark spaces
- Screwdriver set including Phillips and flathead sizes
- Coil cleaning brush and fin comb for outdoor unit maintenance
- Work gloves and safety goggles for protection
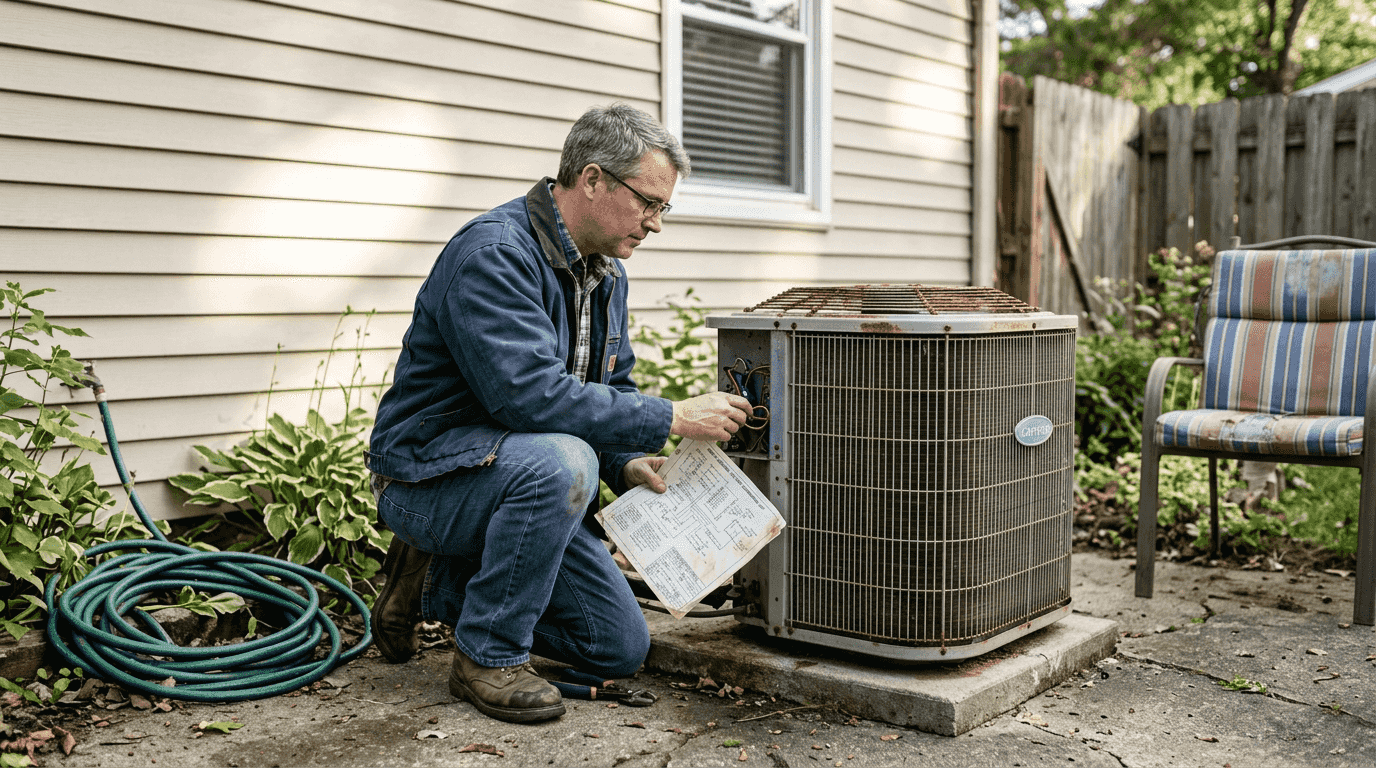
Safety comes first every time. Turn off power at both the thermostat and circuit breaker before opening any panels. Never attempt to handle refrigerant yourself as it requires EPA certification and specialized equipment. Wear protective gloves when cleaning coils or handling components. Keep your workspace clear of debris and ensure adequate lighting.
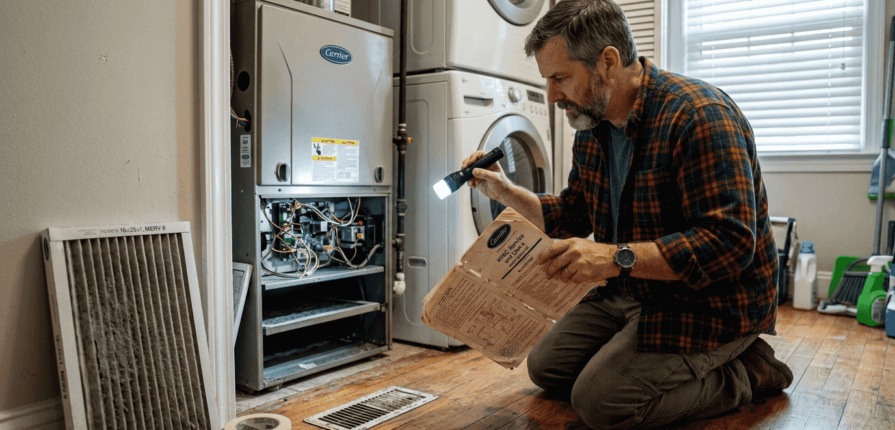
Understand your system layout before starting. Locate your outdoor condenser unit, indoor air handler, thermostat, and electrical disconnect boxes. Keep your owner’s manual accessible for reference on specific components and specifications. Take photos of wire connections before disconnecting anything.
| Safety Step | Why It Matters |
|---|---|
| Cut power completely | Prevents electrical shock and component damage during inspection |
| Avoid refrigerant contact | Refrigerant exposure causes frostbite and requires professional handling |
| Clear work area | Reduces trip hazards and provides room to maneuver safely |
| Document connections | Ensures correct reassembly and prevents costly wiring mistakes |
Pro Tip: Label wires with masking tape before disconnecting to simplify reassembly. Your HVAC repair workflow guide provides additional preparation tips.
Step by step HVAC troubleshooting process
Follow this systematic approach to diagnose your HVAC issues methodically. Each step builds on the previous one, eliminating simple problems before investigating complex ones.
-
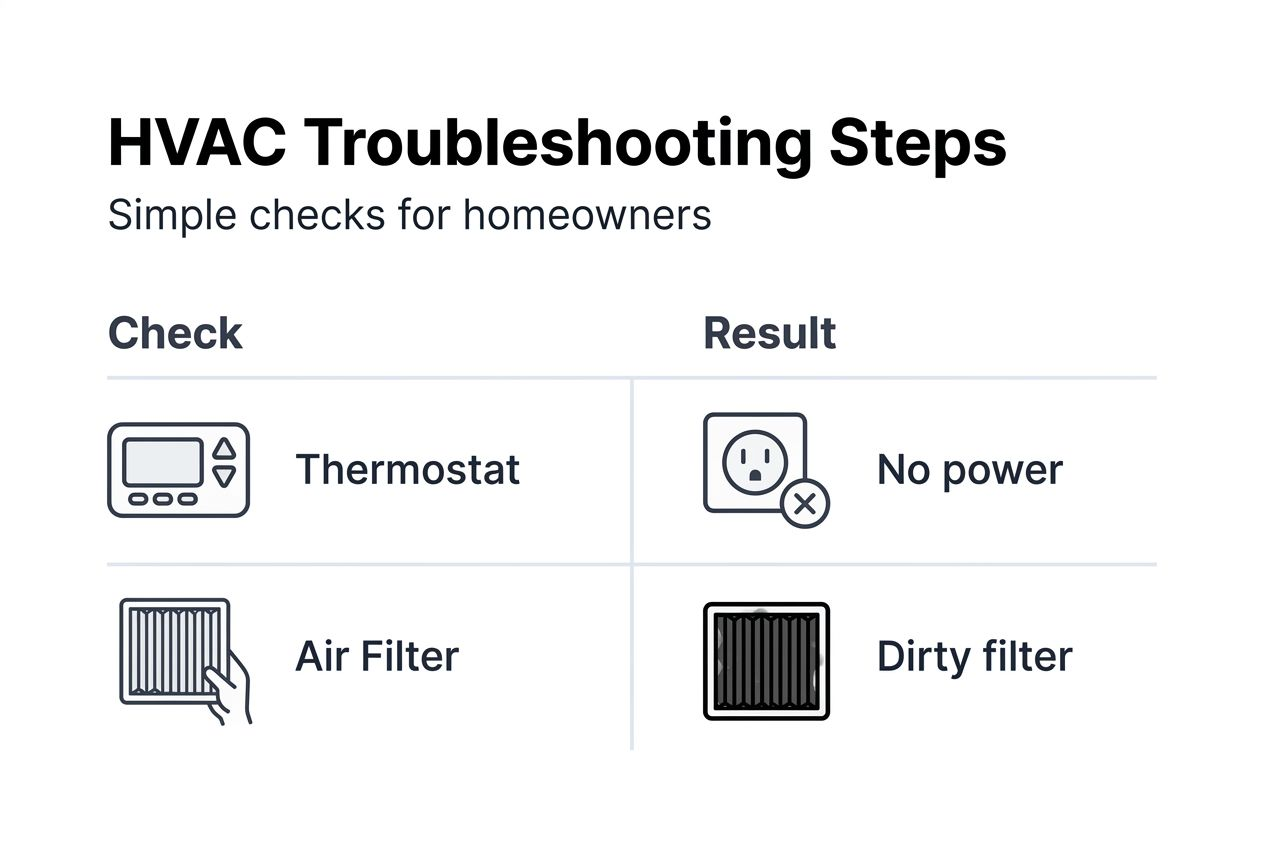
Check thermostat settings and power supply. Verify the thermostat is set to cooling mode with temperature below room level. Replace batteries if the display looks dim. Confirm the system switch is in the on position.
-
Inspect air filters and replace if dirty. Remove the filter and hold it up to light. If you can’t see through it clearly, replace it immediately. Dirty filters cause 80% of airflow problems.
-
Examine vents and ducts for blockages. Walk through your home checking that all supply vents are open and unobstructed by furniture or curtains. Blocked vents force uneven cooling.
-
Listen for unusual noises. Turn the system on and note any grinding, squealing, or hissing sounds. Hissing often indicates refrigerant leaks that need immediate repair.
-
Check for refrigerant leak signs visually. Inspect the evaporator coil for ice buildup and the outdoor unit for oil residue around connections. Both signal refrigerant loss.
-
Test circuit breakers and reset if tripped. Check your electrical panel for tripped breakers. Reset once, but if it trips again immediately, stop and call a professional.
-
Call professionals for refrigerant or electrical issues. If you’ve identified refrigerant leaks, electrical faults, or compressor problems, professional service is essential.
| Troubleshooting Step | What You’re Testing | Next Action If Failed |
|---|---|---|
| Thermostat check | Power and settings | Replace batteries or recalibrate |
| Filter inspection | Airflow restriction | Replace filter immediately |
| Vent examination | Air distribution | Clear blockages and open dampers |
| Noise identification | Mechanical condition | Schedule professional inspection |
| Leak detection | Refrigerant integrity | Contact certified technician |
Pro Tip: Document your findings at each step. This information helps technicians diagnose faster if professional service becomes necessary. Your step by step HVAC repair workflow offers additional diagnostic techniques.
Common troubleshooting mistakes and when to call a professional
Even careful homeowners make mistakes during HVAC troubleshooting. Avoiding these errors saves money and prevents safety hazards.
Never ignore warning sounds like hissing or bubbling near refrigerant lines. These noises indicate active leaks that worsen rapidly. Ice forming on evaporator coils isn’t normal and signals refrigerant loss or airflow problems requiring immediate attention. Don’t keep resetting tripped breakers repeatedly as this indicates serious electrical faults that risk fire.
Attempting refrigerant work yourself creates multiple problems. Refrigerant leaks require qualified technicians who have proper certification, recovery equipment, and knowledge to repair safely. Homeowners lack the tools to measure refrigerant accurately or detect small leaks. Improper handling releases greenhouse gases and violates environmental regulations.
Recognize when DIY troubleshooting ends:
- Refrigerant leaks or low charge levels
- Electrical problems beyond simple breaker resets
- Compressor failure or unusual compressor noises
- Persistent water leaks or drain clogs
- Strong burning smells or visible smoke
- System age exceeding 15 years with declining performance
“Homeowners who attempt refrigerant repairs without certification risk equipment damage, environmental violations, and personal injury. Professional service ensures safe, compliant repairs.”
Call professional HVAC repair services when you encounter refrigerant issues, electrical faults, or mechanical failures. Technicians have diagnostic tools and experience to identify root causes quickly, preventing trial and error that wastes time and money.
Pro Tip: If you smell gas or detect electrical burning odors, evacuate immediately and call emergency services before contacting HVAC professionals.
Get expert HVAC troubleshooting and repair help in Central Florida
When troubleshooting reveals issues beyond your comfort level, professional help ensures safe, lasting repairs. Lucas Air Conditioning and Heating brings expert HVAC diagnostics and repair directly to Central Florida homeowners.
Our systematic HVAC repair workflow guide ensures technicians diagnose your system correctly the first time, eliminating guesswork and preventing unnecessary part replacements.
We specialize in professional HVAC repair services that address refrigerant leaks, electrical faults, and mechanical failures with precision. Our veteran owned team understands Central Florida’s unique climate demands and provides solutions built to last. Preventative maintenance plans catch problems early, saving you from emergency breakdowns during summer heat. Following our preventative maintenance guide keeps your system running efficiently year round. Contact us today to schedule a thorough system inspection and experience reliable comfort.
FAQ
How do I know if my HVAC has a refrigerant leak?
Refrigerant leaks cause poor cooling, hissing sounds near refrigerant lines, and ice formation on evaporator coils. You might also notice higher energy bills as the system works harder to maintain temperature. If you suspect a leak, contact a certified technician immediately to prevent compressor damage.
Can I recharge my HVAC refrigerant myself?
No, handling refrigerants requires EPA certification and specialized recovery equipment. Improper recharging damages your system, releases harmful greenhouse gases, and violates federal environmental regulations. Always hire licensed professionals for refrigerant service.
What routine maintenance helps prevent HVAC breakdowns?
Replace air filters monthly during heavy use seasons and keep outdoor units clear of debris. Schedule annual professional tune-ups to catch refrigerant leaks, electrical issues, and mechanical wear early. Following a detailed home HVAC maintenance checklist extends system life and maintains peak efficiency.
Why does my AC freeze up during operation?
Frozen evaporator coils result from restricted airflow caused by dirty filters, closed vents, or low refrigerant levels. Turn the system off immediately and let ice melt completely before restarting. If freezing repeats after filter replacement and vent checks, refrigerant loss is likely and requires professional repair.
How often should I check my HVAC air filter?
Inspect filters monthly and replace when visibly dirty or every 30 to 90 days depending on usage and household conditions. Homes with pets, allergies, or high dust levels need more frequent changes. Clean filters prevent 80% of common airflow problems and improve energy efficiency significantly.
